Christopher Tate: We've covered playback from disk. Next we're going to cover the remaining three. Owen Smith, the DTS minion of earlier, is going to cover the next two sessions: capturing to disk and offline processing.
Owen Smith: Okay. Thank you. I thought I was going to have to reintroduce myself because I didn't think anybody would have actually woken up early enough to attend the morning sessions, but, man, there were so many people there. I was really proud of you all. Again, I'm Owen Smith. I'm one of the DTS engineers, and I'm going to be talking to you now about capturing to disk, and the various things you need to think about when you're actually taking live input coming from some source and writing it. You're not doing anything more with that data. Chris is going to talk about that case later on.
So I had written an application a couple months ago that encountered this very same issue, and that's why I'm here talking to you about it. The name of the application is SoundCapture. I don't know if any of you had you a chance to look at the sample code for that. If you did, I apologize for the code that you used to implement the nodes. It really is much, much cleaner now and I will be putting a much nicer versions up on line in the next week or so.
Anyway, what this application does, is very simple. It takes the sound card input, and writes it to disk. Very simple.
The kind of file it writes is a raw audio file. It just takes the frames, the audio samples and blasts them directly to the file. It doesn't even do any header information. It's that dumb. The header information actually gets stored in file attributes that are associated with the file.
So I'm given an audio input hardware and I'm not going to assume for this application that there's just one sound card because we all know this is the Media OS. You can have lots of sound cards each doing their own thing, and you want to capture say from one of those particular cards and you want to be able to select the card you're going to record from. And then we have an output file.
SoundCapture, the way it works is when you hit record, it just starts recording to a temporary file and then later on when you're done recording it, you can decide if it's worth saving to a real file.
Here's the overview. We start off with the microphone. It doesn't necessarily have to be a microphone. If you've seen the what used to be the Audio preferences panel, which has been assimilated into the new Media preferences panel, you'll notice that for input you have a choice of what you want to record from. You can get your input from the microphone. You can get it from like your CD player if you have it hooked into your sound card. You can get it from some auxiliary input. But this is whatever audio is coming in. It goes to this node. It goes to this node here, the audio input, which is the actual node that's going to produce the buffers for me, and it's going to produce raw audio buffer data. Then I hook that up to my own special file writer node, and what that's going to do is receive the raw audio and stream it straight into this file.
So the tasks that I'm going to describe today -- I don't have all the fancy sample code like Jeff, but I'm going to give you an overview of the stuff I had to deal with, and the various interesting tasks I did when doing this.
First of all, there was some code I wrote to allow you to select the audio input. You have a pop-up menu of the available sound cards. You can select from the pop-up menu which sound card you actually want to record from. Second of all, I actually create the sound file writer, and it's worth reiterating how you go about creating these nodes, how you go about finding the nodes, creating them, connecting them. We'll be covering that in several different instances and then the starting and stopping recording. There are several issues you need to think about when you're doing capture.
First of all, we'll be talking about the audio input.
Three steps I have when I'm actually going to select one of the cards I'm going record from. First of all, I need to know what all the available audio inputs are for me to derive from. So each sound card would have a node associated with it, and I want to find which nodes those are and I want to be able to list them. So the second part is maintaining the pop-up menu. The so the pop-up menu I need to have a list of the items. I need to know what the names of those items are, and then finally, I'm going to actually take the default audio input, which is the audio input that was selected in the media preferences panel, which is this is the sound card I want to use for most of my system, and use that as my initial selection in the pop-up menu. So you'll see that as the first thing that's checked off.
Let's talk about finding the audio input nodes. Now, the audio input nodes are generally handled by the system, which means they're already around by the time my application starts running. They've already been created. They're sitting out in free space hopefully not doing anything.
So what I do to get these nodes instead of using GetDormantNodes which gives me stuff that can be created, I want to use this function GetLiveNodes, which tells me the nodes that are already created and registered with the Media Server.
So this will search for the nodes that have already been created. And when I do the search, as with dormant nodes, you saw that you could do things like search for a particular node kind. You saw when he was doing his video decoder, that Jeff was looking for a node that was both a buffer producer and a buffer consumer. In this case I'm going to be looking for a buffer producer and I'm interested in looking for a physical input. It's just wonderful that will we have this magic node kind that I can look for that will find all the physical inputs of the system. That will give me video inputs, and that will also give me audio inputs.
So the second piece is I want to tell it what kind of format I need in the output. What I need is any kind of raw audio output. So when I do that I will get a node that is a buffer producer, it's some sort of physical input and it's spitting out raw audio. And that's all I need to know.
The next thing. I have to create the pop-up menu to put these inputs in. This part is fairly simple. If I had to go through all the mechanics of describing the Application Kit and Interface Kit which do all the work of maintaining the pop-up menu, that would be another conference in itself. So I'll just gloss over this part and if you have further questions, you can talk to me afterwards.
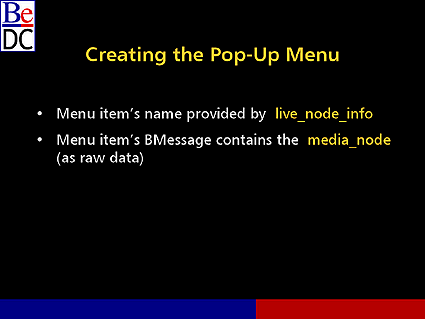
But two main things I wanted to point out. First of all, I need the names of the menu items. Conveniently this information is provided by the structure live_node_info, which, as you might expect, is what's actually returned by GetLiveNodes. So I get back something that's called the live_node_info, it contains the name of the node that's being run, and it contains a media_node structure that actually describes the node. It's the real handle that I have.
That name, I just plug it straight into the menu item. That's really easy. The second part is, I need to figure out how I'm going to actually refer to the node, and when I select the menu item I need to find the node that that menu item was associated with, and I need to use that as my input so that's the one I'm going to be remembering, okay, I need to record from this guy.
One way to do that, and the way I used to have to do it when I was programming in Windows a long, long time ago, was to keep track of - okay, I got a list of media nodes or something like that and then when I select a menu item, I send a command; I look through this list; I find things that match up, and then I do it. It's one way of doing things.
And there's another way that I vastly prefer now that I'm working at Be, which is actually storing it in the BMessage. Each menu item has a message that gets dispatched to the application when that menu item is selected -- actually to the window object -- and what I can do, I can stuff the media_node structure straight into the BMessage. So, I get the menu item selected. I get a BMessage. It has a raw media_node structure in it. I unpack that and I use it as is.
So finally, I need to find the default audio input, and make sure I have that as my initial selection. Luckily, there's a function that does this for me and it's BMediaRoster::GetAudioInput. This is what Stephen was talking about earlier when he talked about certain standard kinds of nodes have short cuts that the media roster gives you BMediaRoster for getting them. The default system audio mixer, the audio input, the video input, the audio output and the video output, all have all have these shortcut functions which I call them and I get the node back. Simple as that.
And then what I do is I stomp through the list the live nodes that I have and the media node structures that I already have and I can just compare to see if the structures line up. I compare to see if all the fields match up, and if they do, I know I have the same node and that's the one I want to select. That's the menu item I want to select.
So now I've selected the audio input. The next step is to create the sound file writer node. And this is the thing that's going to actually be doing the work of taking the audio buffers as they're spewed out and writing them to the file.
Now, I have a local node in my application which I call SoundFileWriter now, and SoundFileWriter is derived from BMediaNode and it does the work I need it to do. You saw how you can instantiate dormant nodes. That's if the dormant nodes don't necessarily live in your application, they live somewhere in your add-on. And you want the add-on to take care of creating them for you. Here, I'm in the application. I have this local node. I do the work myself and it's very simple. I just use the C++ new operator. I get back an instance of the SoundFileWriter. The important step is what I do immediately after that.
What I have to do is register that new BMedia node derived thing with the media server. So there is this function BMediaRoster::RegisterNode. If I forget to do that, then my node will not be known by the Media Server. It will have no idea what I'm talking about. Some nodes will actually do this for you in their constructor, but I didn't do that in this application. And then finally, I pointed the file writer at a file location. This is the exact same call that Jeff uses in the Media Player, which makes me feel good that my application is somehow stacking up against Media Player. I don't know if that's quite the case. But BMediaRoster::SetRefFor is what I do. So you use this for reading files, and you use this for writing files. Any time you want to point a node at a particular file, and it's capable of doing that.
So the next step is to start and stop recording. First of all, I need to set the time source, and then I need to set the run mode. Both of these steps are a little different. What also I'll be doing is prerolling the nodes, starting the nodes, stopping the nodes, make sure I have them connected up before I do that, but you've already seen the mechanics of how that's done. So I'm just going to cover the things that are important for recording.
First of all, let's talk about time sources.
Now, usually when you have an audio input node, it will be a time source because most hardware nodes have some source of time, some sense of time that they're going to be publishing. Certainly the sound card I'm using does this. And then both nodes actually get slaved to this input for maximum accuracy so that I don't have any question when I get time stamps on my buffers, what sense of time that is. The audio input node is the thing recording them. So that's as accurate a telling of time as I could get.
And then I actually may need to start the time source. This node may be just sitting off doing nothing and its sense of time may not even be running. So what I do is there is a function that's called IsRunning that I can use to see if this thing is actually running and if it's not, I actually use the same command Start that you would use to start up any other node and I use that to start up the time source.
So we've talked about we're going to set our time source to the input time mode. The other thing we need to do is set the run mode.
Now, we haven't talked much about run modes here, so run modes are -- run modes tell your nodes how to behave as they're running under certain conditions. Noticeably when they notice that buffers are getting late, it tells them how to respond to that. There are several different ways you can do this. And several different kinds of run modes that you can set is what I really mean to say.
So one of the run modes you have is B_DROP_DATA which means okay, if you're late, you just drop the data and catch up as fast as you can and just get rid of all the data in between so that you can catch up.
Another one is B_INCREASE_LATENCY, which eventually results in you have to send those buffers earlier.
Another one is B_DECREASE_PRECISION, which for nodes that support that sort of thing, like some sort of encoding and they can just alter the resolution of the decoding, they can do that.
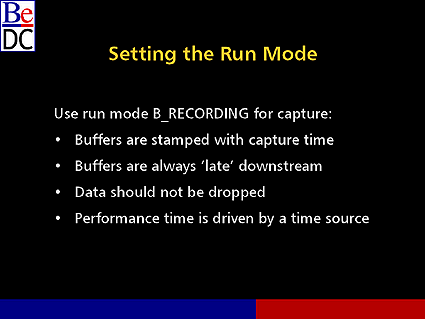
The run mode I will be using is called B_RECORDING. And this is the mode you want to use for capture.
Here's what this run mode says. It says the buffers instead of being stamped with the time at which the buffers should be played, I'm not really playing anything in this system. I'm just recording it. Instead, the buffers are being stamped with the time at which this buffer was captured. So that means that the buffers are always going to be late when they arrivedownstream.
If I was taking the naive approach to think okay, I have a buffer that says 50 milliseconds. It's 55 milliseconds. Oh, my God, this thing should have been out the door by now. That's not the case. What it really meant was this was recorded at 50 milliseconds, and so this is informing my nodes instead of freaking out and dropping the buffer or doing something catastrophic, they will deal with it naturally. They will say oh, yeah, we're recording this. This is okay.
So data should not be dropped in recording mode for obvious reasons. But you do have your performance time being driven by a time source. So you can't forget about time altogether. You do still need to be running fast enough to grab the buffers from upstream and write them to disk.
So you don't need to know much of the mechanics about how the nodes do all of this, but you do need to know that that's what the nodes are going to be doing when you set that run mode.
So that's pretty much all I wanted to cover about how SoundCapture works as opposed to Media Player. The specific things you need to know when you're recording. The two tips I want to leave you with, the take home messages are first of all, set all nodes to the input's time source. That way your time is accurate, and second of all, use B_RECORDING run modes so that all your run nodes are interpreting the buffer time stamps correctly and don't go crazy. Should we stop here? Let's stop here for questions, if you have any. Please.
Audience Member: In the previous session it was said that we couldn't use BPositionIOs instead of entry_refs because BPositionIO doesn't have any meaning to the Media Server since it is running in a different address space, but in your example you're instantiating your own what was it? Sound file writer?
Owen Smith: Yes.
Audience Member: So doesn't that also not have any meaning at all to the Media Server?
Owen Smith: I'm not sure I understand you correctly there.
Christopher Tate: I think I do.
Owen Smith: Okay.
Christopher Tate: I think I understand what you're asking. Once a node is live in the system and has been registered with the Media Roster, any application can use that node. All of the relevant data is stored in shared memory so if SoundCapture is running and some other application were to be started that wanted a raw file writer, which was the class he implemented, then in the list of live nodes in the system, lo and behold that class would be available and the other application could connect to it. In passing information to it, your application B can't pass a pointer within its own memory space to application A, but entry_refs are global so those are legitimate.
Jon Wätte: I'll just hang on to this thing [the handheld microphone]. [audience laughter] In the case you are asking about, you could conceivably pass a BPositionIO to the constructor of the sound file writer. Then that sound file writer does not have to be a file interface. It would just write to the BPositionIO you supplied. You can do this because you wrote this for your own use. But if you do that, then nobody else can tell you where to write to. Because that's a function call and only whoever called new can call functions on you, and in general you shouldn't do that, because that could race with the node service thread.
So yes, in this case you could use a BPositionIO and just make it your private protocol for specifying where this thing should write, but as a general case, the kit cannot do that for you. Does that answer the question?
Owen Smith: Okay?
Audience Member: Can you enumerate the modes, you know, that you can set? So like, for instance, because something, you know, might not support, you know, degraded, you know, decoding. So you might have to fall back to dropping data, right? Because obviously the worst that you can do is drop data; right?
Owen Smith: Right.
Audience Member: So if it can handle more gracefully you'd want to set it to something that's more graceful. I don't know how many options there are because you didn't list them.
Owen Smith: The options are drop data, decrease precision, increase latency, recording, and offline, which I'm going to talk about in five minutes. Those are the five that we have supported right now.
Correct me if I'm wrong, Jon, but what happens then is you will call a roster function SetRunModeFor, and if the node can't do that at all, it should return an error; right? And you will catch that error and say, okay, it's not quite that sophisticated. I'd better drop down to a different run mode.
Audience Member: So you would just drop down?
Owen Smith: Sure, you can do that.
Audience Member: Until you find one that you can do?
Owen Smith: In this case if you can't do B_RECORDING, you're pretty much out of luck because those buffers are going to be late, whether you like it or not, the node is not going to do what you want. You can't use it for recording.
Christopher Tate: In general, any node writer whose nodes can't support drop data if they're a filter and maybe offline and recording, that node writer ought to be taken out and shot. [audience laughter] You don't have to support increased latency if you know that all you're going to be doing is offline rendering. You know you don't have to support decreased precision if you know that all you're going to be doing is offline rendering. But if you're doing anything at all useful you should be able to support offline.
I suppose you don't have to support drop data if you will only be doing offline rendering, but most really interesting media applications don't involve offline rendering. So pretty much everybody will support at least offline and drop data. Maybe recording if it's appropriate. I can't think of why it wouldn't be, but I'm prepared to accept that there might be a case, and you the application writers can pretty much assume that if you're doing anything real time, then drop data will be accepted, and if you're offline, then offline will be accepted and go from there.
Owen Smith: And all the node writers next-door or two rooms over are getting a pretty firm schooling in run modes just about right now so I'm sure much abuse is being heaped upon them.
Audience Member: Earlier in your instantiation you did a Register of the node?
Owen Smith: Yes.
Audience Member: And I believe you said that some nodes do that in their constructor.
Owen Smith: Yes.
Audience Member: A, can you tell it's already done? And B, what happens if you do it twice or you call it again or is it just -- does it just return and everything is okay?
Owen Smith: I'll defer to the person who wrote it.
Jon Wätte: B_DONT_DO_THAT. It's a secret error code. [audience laughter] No. A node that you call new on is like an API, like any other class, that's instantiated, you need to know how it will work. So whoever wrote this class if you didn't write it yourself will document that it Registers itself in the constructor.
Personally, I would never do that. I recommend that nodes are registered separately by whoever called new because you might want to derive from the node, from the class and if the class then Registers itself in the constructor it is already going to be Registered by the time your derived constructor gets called, which is a bad thing.
So again, if you're writing a node and are in the other room, register the node unless whoever gave you the code tells you not to.
Audience Member: Could you illustrate what happens if you get further and further behind and you can't catch up or aren't catching up?
Owen Smith: In this case you're going to be trying to write buffers. What will happen is that as buffers are coming in, if you're not handling them in a timely fashion, they're going to start backing up. Then once you back up beyond a certain point, you have a limited pool of memory from which these buffers are being drawn.
So the audio input, it's mode is "okay, get a buffer, fill it, send it. Get a buffer, fill it, send it...." At some point it's going to run out of memory and it's going to block waiting for the next buffer to be released so that I can get a next buffer. So in that case you will stop receiving data. You'll be able to handle it, but then when the audio input picks back up and gets a buffer, guess what? It's missed a bunch of data in between so you will get a glitch. So that's why it's important because time is still running in this case that you be able to keep up with this data, and if you can't, there's not a whole lot you can do in that case.
Audience Member: Who controls how much memory is available?
Owen Smith: Who controls how much memory is available? There are actually several ways that's done. If you want to do that, you're welcome.
Jon Wätte: Assume that the nodes know how to do this. There is an API for it. Nodes figure it out between themselves. There should be enough buffers to cover whatever latency the downstream node publishes, and the downstream node can also tell the upstream node what buffers to use. And if you want to know more, it's in the BeBook or talk to me.
Christopher Tate: As a general point here, the BBuffers are really for handling real time data, the data that's coming in from the input node, and it's going to need to have buffers available to it, all the time. So if you're really doing a recording application, you might want to seriously consider double-buffering the output so that the ultimate consumer gets in a BBuffer, copies that data into an output queue, and then recycles the buffer back to the input, so the output queue can back up until hell freezes over, and the parts of the node chain that have realtime requirements don't care.
Owen Smith: That's a good point.
I'm going to talk about now offline processing. And offline is quite a bit different from what we've discussed so far. Playback and capture are rather similar in a lot of respects. But offline is really kind of an odd one of the bunch, I like to think. So let's go into it.
Some of you may have noticed the article I wrote a few weeks ago, called Mix-A-Lot. There was an application called Mix-A-Lot, which didn't work on anybody's system so I don't think anybody actually looked at it. It's working on Genki. And I'll be uploading the newer version that actually does work.
But what I'm also working on right now is an extension of this where instead of mixing in real time and piping out the audio input it reads a bunch of files and mixes them down to an output file, just because I'm a musician and I like to do that sort of stuff. So I have an application called a Mix-A-File. And that's what it does, takes a bunch of input files, gets a mixer, mixes them down to one final file and writes it out to disk. So I'm given a set of input files and I'm given a destination file.
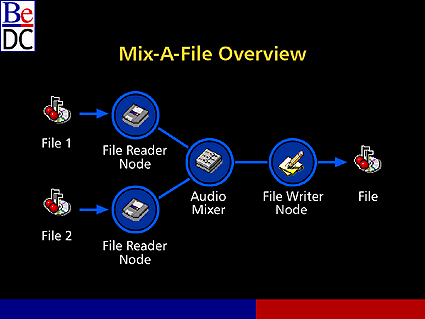
Here's what the chain looks like assuming that I have two input files. Of course, it's not limited to that. So you can literally have as many as you want here. You have the file here. You get the file reader node. Two file reader nodes. They're actually the same sort of thing. They can read various kinds of formats right now. They read AIFF, they read WAV, they read the Sun ".au" sound stuff and then they pipe into an audio mixer. This is not the system mixer. This is my own audio mixer which I'll be describing in a bit, and then I go to a file writer node, which actually writes off the file. Sneakily enough, this is actually the exact same node as I used in the SoundCapture example. The sound code -- reuse in action. Don't know too many people that can actually say "code reuse that works."
Again, there are three things I want to discuss here when I'm talking about the important salient features in Mix-A-File. First of all, the bit for creating the sound file reader is a writer. Secondly, this is pretty interesting stuff. How I actually got the audio mixer and then finally, the starting and stopping of mixing. This is very different in offline mode and I'll explain exactly why.
First, the readers and the writer.
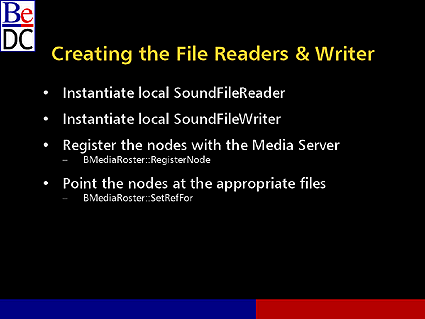
In this case I have a SoundFileReader in addition to the SoundFileWriter, and they're all local. So again, I'm going to be allocating these locally and registering them with the Media Server, and I'll be playing with the appropriate files. This looks very, very similar to the previous thing so I won't spend too much time on it, but it seems to work well for me because then I don't have to work on creating add-ons. At some point I may have to push some of the stuff into add-ons. I'll be using dormant nodes instead of this sort of stuff, but if you need to get something up and working quickly, this is good way to do it.
Now, the audio mixer is kind of interesting. What I'm actually using is the system mixer that is being used for the whole BeOS system as a whole, but instead of using that system, which it's not just servicing my application, but it has every application that has an input to the mixer is being mixed into that thing. I just want my own private mixer that nobody else is hooking up to. I'm just dealing with this thing and I can hook it up however I want and set it.
So what I'm going to do is, I'm going to take the add-on that created the original mixer node and I'm going to use it to create one of my own, which is very useful. That's very nice. That means I don't have to write the mixing code myself and since I don't know a whole lot about resampling and mixing and stuff like that, it's easier for me as an app writer.
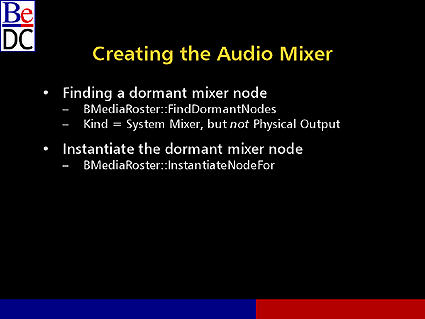
So the first step is to find the mixer dormant node, and the way I do that is via BMediaRoster::FindDormantNodes. This will give me a list of all the dormant nodes that can do something. Now, I'm going to qualify the search and say I'm looking for the kind B_SYSTEM_MIXER. Now, there is also a field in FindDormantNodes that allows you to deny specific kinds. So in addition to I want a buffer producer, I want a buffer consumer, but I don't want a time source, or something like that. You can also specify things you do not want to search for. So what I'm going to say is I do not want a B_PHYSICAL_OUTPUT. Why? Because a physical output system mixer would be in the future, perhaps, a system mixer that was implemented in hardware. And generally there's going to be one of those that's sitting off on some sound card and it's going to serve the system as a whole, and I'm not going to be able to do anything with that. So I'm just going to go into my software audio mixer for now.
Once I have this node and somehow magically I seem to get one of these dormant nodes every time I make the system call because that add-on is sitting right there, I'll actually instantiate it using InstantiateNodeFor. So this is the classic get a dormant node. I have a dormant node. I instantiate it. This is the way you can access system wide nodes all over the place, and anybody can write them; anybody can use them. They're really useful. If you have someone who has that wide-reaching an application.
Next the starting and the stopping of mixing. This is where all the nitty-gritty offline stuff happens.
Two things I'm going to cover here. First of all, what run mode should I be using? And I've already given you a clue what that's going to be, and then how do I actually start and stop this stuff?
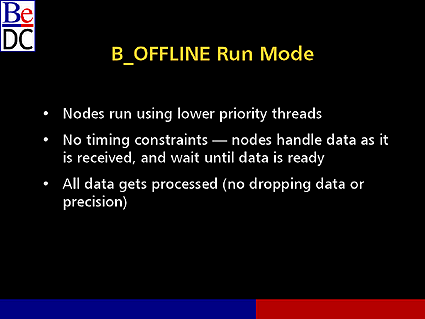
The run mode. The run mode I'm going to be using is called B_OFFLINE. And this tells the nodes that they are not running in real time. First of all, they will not be real time threads so they won't be hogging the CPU. They know that they don't need it, because .. there are no timing constraints in offline mode. Things can literally go as fast or as slow as the nodes can drive it.
So what will generally happen is as a file writer node, let's say, if I'm writing in offline mode, I will sit there and wait, and when a buffer comes in, I will write it and then I will wait and I will just wait as long as it takes for the next buffer comes in.
Now, all data gets processed in offline mode. It's the only reason you want to do offline mode in the real time world like we live in because the only thing you get out of it is the ability to do extra processing and get extra data that you wouldn't be able to get in real time. So there is no dropping data.
There is no decreasing precision. Everything is just crystal clear quality at the price of whatever processing time you need to do. If you do need to do less precision or something like that, you can work that out with the nodes, but that's what I'm dealing with here.
Time behaves totally differently in this case. Because, there are no timing constraints there is no time source associated with offline mode. So my nodes are not running on a time source at all.
Oh, man, what do I do now? What happens here is that performance time is treated in a radically different way than you would treat it normally. You have output and it has a media time associated with it. In this case I have a file, and I know I want this file -- let's say I want this file to be six seconds long. The performance time that I'm going to be dealing with in these buffers, what the buffers will get stamped with is going to be directly related to the media time I'd like to see in the output.
Now, how are they related? Well, I as the application have to set the relationship between performance and media time, and the way I do this is I seek the output. So I say generally for purposes of ease of use for me I say for the output file, zero performance time is zero media time and then performance time literally is the media time of the output file. So then I can say things like I want to start something at performance time 1. What I really mean is I want this sound to start going in at like one unit into my sound file. So it's a different sense of performance time. It's a different interpretation.
Audience Member: Question.
Owen Smith: Yeah.
Audience Member: So if I have play from file to start off with and I want to go through your mixer, my play from file already has a time stamp in it. We do that in the microseconds from when we made that node originally. Now we go to offline mode. What's in that file play from start at six seconds and I stamp from my offline 12 seconds? Am I going to be basically sampling at half rate into there so it will have a slow recording when I playback?
Jon Wätte: The unit is still microseconds.
Audience Member: This is what I have problems with, I really do.
Jon Wätte: The unit is still microseconds. Suppose you have a file that is longer than what the output is, you might want to seek the media find to start 3 seconds into the file and then you roll for 6 seconds. So you say you tell the file at performance time 0, start playing at media time 3 seconds. And then play from performance time 0 to performance time 6. That will have the producer play from media time 3 to media time 9. So there is basically a delta between the performance time and your actual media time that you as a node would have to maintain. Does that answer it?
Audience Member: That's okay. It will get sorted out in the weeks to come.
Christopher Tate: We have diagrams that will cover some of this a little later in the slide slow.
Owen Smith: I could take any other questions about this, too, because it's a new concept of time. So if you have any other questions about how this time works. Let me get through the next part and maybe that will help clear some of this stuff up.
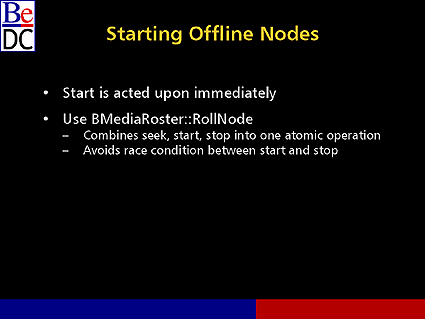
The starting and stopping of mechanisms and the way they work. Now, normally like if I'm in some sort of real time run mode, let's day B_DROP_DATA just for purposes of argument. Let's say I issue a Start command. Generally what I'm going to say is start at time X and it will wait, you know, using its time source clock until X is reached, and then it will take effect and then this will start. In offline mode we don't have a time source so when you issue a start command, you say "start at five," it is going to act upon that immediately and start at 5 and it's just going to start at 5 and just start crunching stuff. We send a Stop command the same way, and then we'll run until we get to the next Stop command.
So the way the node might work is: let's say it sends out a buffer with every unit of time and let's say I want to start it at five. I want to stop it at ten. So I want to start it at five, it will say, okay, starts immediately, five-six-seven-eight-nine-ten-.... Sees a stop command in the queue, it stops. But wait. There's a problem here. Because I don't know how fast this node is running, and in offline mode, especially for simple mix-down, these things are cranking. There's a problem that I can send it a start command and then I can send it a stop command to end say, stop five units later. There's a big race condition there. And so we have introduced a new function for Genki, called BMediaRoster::RollNode.
RollNode is really your friend. A RollNode combines a seek operation, a start operation, and a stop operation into one atomic unit so I can say seek-start-stop. And it will queue up those events and it will handle them in that order. So this way I can issue a RollNode command, and in offline node it can go as fast as it likes and it will always handle the stop correctly.
So when you're trying to command these nodes around, you're not going to do a start and then a stop because that stop may not get handled correctly. Instead you'll do a roll node and you will say first of all, the media time that you want it to start at, second of all, the performance time you want it to start at, and finally the performance time at which it should stop.
Now, one thing you need to worry about here is before when I was in the application, when I said you're going to stop five seconds into the future, I could count on the fact that five seconds into the future (maybe plus some fudge factor if I wanted to be absolutely sure), I could wake up and say, okay, my nodes are done. It's safe to tear them down. Again, in offline processing there is no concept of time as it relates to media application. I have no idea how fast these nodes are going, and so I don't know a prioriwhen these things are going to actually be completed.
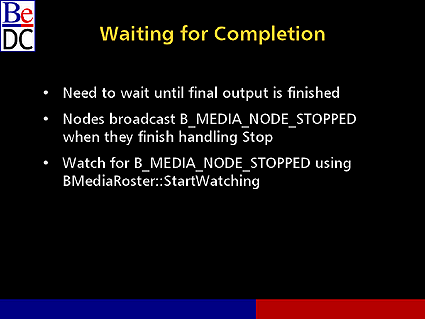
So there is an additional thing we have to add to allow you to know when a node is finished doing something and particularly when a node has completely stopped. So now in the Genki release, nodes will be broadcasting a message called B_MEDIA_NODE_STOPPED. This message will get sent out to anybody listening to this message, and I'll tell you how you can do that in a few seconds. When they finish handling a stop request.
So I'm going to set these guys running. I'm going to roll the node and say you're going to start here. You're going to stop there. And just go. It will go. It will go. It will go. It will go. It hits the stop, processes it. And when it's all done, it sends a B_MEDIA_NODE_STOPPED command, which somehow, and I'll tell you how, you will get that message and know everything is done.
So the way I do this in the offline chain is I set everything running and then I watch the final output and wait until it's done and then once that's done, I know I can tear everything down and the file is complete.
So the way I do this is using the function BMediaRoster::StartWatching. StartWatching and StopWatching you'll be seeing later on. Chris is going to talk how they pertain to parameters, but you can also use them to watch for other kinds of notifications as well. For instance, when a node goes crazy and it can't do something and it needs to tell the application something has gone bad. It will sometimes broadcast -- or should broadcast -- a B_NODE_IN_DISTRESS command. You can watch for that. Changes to parameter webs, which Chris will cover, you can catch those. When a node is stopped, it will broadcast a message. You can catch those as well. It's a general notification message for any messenger or any handler in the Be system to know when something is happening in the media system. So it gives you feedback.
Now, if that wasn't enough abuse for you, I have some more stuff, but before that can I take any questions on what I've covered so far?
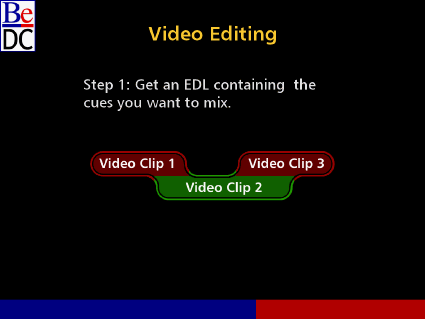
Let's get a little more complex. Let's take an example of video. Let's say I want to do some more offline processing. In this case it's not going to be a case where in Mix-A-File I just have a bunch of files, I start them all at zero, I take them for as long as the duration of the file is. In this case I'm going to have a series of cues. They're going to be different segments of different files at different times in the output media, and maybe I'll be applying transitions to these and then I want some final mixed-down file.
So I am given an edit decision list -- I'm going to call it an EDL -- which just contains a list of the clips and what time I want them to play at, where they show up in the time line. So here I have three clips. Here's one. It starts here, stops here. Two, starts here, stops there. And three, starts here and stops there. And so I'm going to take this whole thing and write it out to a file.
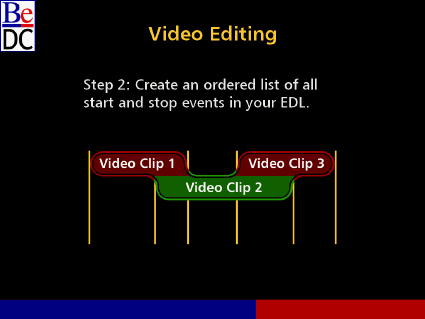
What I need to do as an application to handle this case is first of all, I need to create an ordered list of all the start and stop events. So start, start, stop, start, stop, stop. I take all the things for all the nodes involved or all the cues involved really in this case. I'm going to lay them out in one chain of events, which you're probably already doing -- if you're going to need to apply transitions, you're going to need to know where these spots are anyway.
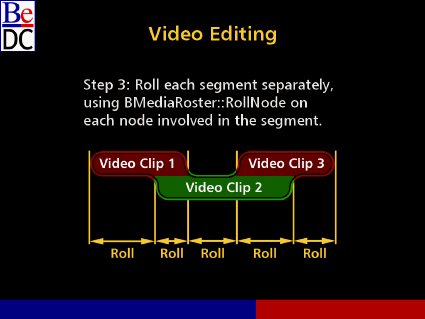
Then what I need to do is roll each piece at a time. And I'll just start here. I'll take this segment. I'll roll this video clip, wait for it to finish, then I'll go on to the next one. Roll that video clip, wait for it to finish. Then I'll go on.
Why do I do this? Because in offline mode nodes will wait for data to arrive. They will wait forever for data to arrive. They will wait for data to arrive even if there is no data coming. If you have two nodes here, one of them is handling these two video clips. One of them is handling this video clip. Let's say you start here. The mixers or the compositor or whatever is handling this mixing is going to be waiting for a video buffer from this guy, and then it's going to wait very, very patiently for a video buffer from this guy who, of course, hasn't received a start yet and so it hasn't sent anything, so bad things happen there.
Also, in the case where you stop, you have the case where you stopped sending buffers, but it's going to be waiting for more buffers from you. So in order to avoid people waiting around forever, you break it up into segments where starts and stops happen, and you roll them a piece at a time.
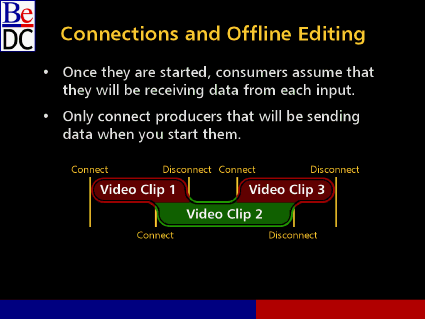
As a corollary to this, let's say we have this case where we have a video clip playing and then we stop and we then start the video clip playing again. When this video clip is done playing, that node will communicate downstream saying okay, I'm done playing now. So as far as that node is concerned, there is no more data coming from that when it's stopped. But later on we do have some data that we want to be sending and the way we can -- somehow we need to tell this mixer or compositor to start watching for this channel again because there will be data coming later on.
The way we actually do this in offline mode, you don't have to worry about this in other cases, but in offline mode, what we do is Disconnect and then re-Connect. Now, you should be doing this anyway, especially if you have a description list that's let's say it's enormous. You have thousands of events and they're all playing. You don't want to create one node for every event. You may not even want to create one node for every channel that you're dealing with. Generally you want to allocate nodes and set them and connect them as you're going to need them. And so you have connections and disconnection points that you're going to be handling as you roll through each of these segments. So it's a little bit more complex than your standard live playback segment.
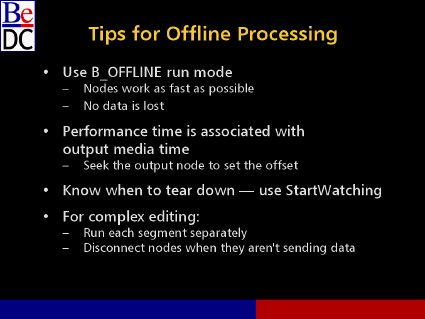
So the final tips for offline processing. First of all, got to use B_OFFLINE run mode. That's what sets this whole crazy scheme up and that's what tells these nodes that they just start crunching data as fast as they can. No data is lost in this case.
And then in offline run mode, performance time is no longer associated with some published time from your system clock or published time from audio card. Instead it's associated with the media time of your output. And you can set an offset by seeking the output. So I could say that when you're at time zero in the file, I'm going to call that time 2 or performance time. You have two output files. You can maintain some common time base for them.
And then finally you need to know where to tear down and you use StartWatching. And when you use StartWatching, you tell it what you're going to be watching. Actually, you don't tell it anything. You get messages. They will have the node that they're associated with, and they will have the command. So you be watching for a B_MEDIA_NODE_STOPPED on the final output in your chain.
And then for complex editing what you need to do is run each segment. Again, you break it up into start and stop events and then run each segment separately using a roll: Seek, start, stop. And then when you're done, and you've reached the end point and some piece of media, you need to disconnect the nodes when they aren't going to be sending data for your segment.
That was a mouthful. At this point I definitely do want to entertain questions, because I think there will be a few.
Audience Member: An example you used for basically an A-B roll, you didn't answer to, okay, so we got the transition so that's a node, a filter node to make the difference between the two. So it would be stopping and starting at the beginning of the transition node? Or because we need both of them we'll have to stop and start and stop from not the beginning and end of each segment, but the whole thing. Does that make sense, my question?
Owen Smith: Yeah. In this case you're going to create a transition. There will be two nodes combined. There will be one node doing the transition between the two.
Christopher Tate: If you have a transition that you're running, then maybe you have a node that's feeding the transition and then you have a node that's actually doing something on those buffers and then feeding into the output downstream. You'd be rolling both the feeding node and the transition handling node. You roll the entire chain for every segment, then reconnect all of the nodes that will be producing data in the next segment, roll that segment, reconnect everything, roll the next segment, and so forth.
Audience Member: Gotcha.
Christopher Tate: If a node is going to be producing data in a given segment, then you can connect it and you roll it in that segment and not otherwise.
Audience Member: So in that segment you break it up, you're going to do a disconnect when it went to a transition; right? You disconnect it and then reconnect it to the top part of the transition as well as the bottom?
Christopher Tate: Right. The decision for how you figure out which segments of time you roll is by looking at what data is actually being produced and written to the output in that given amount of time. You determine that by looking at all of the starts and stops for everything, sorting it by time and just saying, well, okay, something happens here and something happens here, so that's a segment that I roll. And then after that the next thing doesn't happen until here, so that's a nice long segment that I roll and so forth.
Jon Wätte: Just to clarify, transitions are also events that need to go into this event list. It's not here are the quick starts
and here are the quick stops. One transition, the time of one transition across or whatever is actually a start and a stop event of this list as well.

