
 |
3D on the BeOS |
GEORGE HOFFMAN:
We are going to get started
here. I'm going to talk about OpenGL® on the BeOS.
"Industrial Strength 3D"? I didn't write that. So, what
is GL? I mean, that's a pretty well-known question,
right? It's a 3D graphics library, and we support it
initially in DR9. This is the first release that
supports OpenGL®; I'm going to go through it pretty
quickly, it's a big subject so I'm going to skim a
little bit.
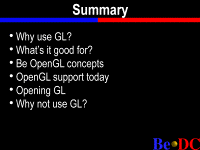 Why use GL? I'm going to talk a little
bit about that, then talk about, well, what is it good
for? Concepts you have to know to use GL under the
BeOS, what GL support we have in DR9, and then I'm going to
actually go through a little bit of OpenGL® code, which
is a bit contrived because GL code tends to be kind of
big. But we will talk about that in Opening GL, and
then there are some reasons why you shouldn't use it and
we'll talk about that.
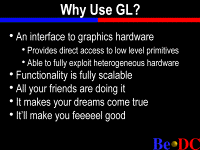 So why use it? Well, it's designed as an
interface to graphics hardware, and that means two
things: That one, it provides you a lot of power by
giving you direct access to all the low-level primitives
that you need to do a lot of different rendering
tasks. But at the same time, because it's designed as
an interface to hardware, it lets you fully exploit all
different kinds of hardware, from the lowest level
cards that just provide span filling and you just hand
a triangle on a screen and screen coordinates and it
fills it, up to high level PCI cards that cost $8,000
that have full geometry pipelines and their own
rendering engines and everything. GL allows you to
use all of them with the same exact code base and it
does that by having a couple of interesting
architectural features that we will go over.
The functionality it provides is fully
scalable, that's part of exploiting heterogeneous
hardware. You can use GL for anything from the lowest
level wire frame rendering -- for instance, in a CAD
program where you have to move objects around in real
time, you need speed more than anything, you might want to
just use wire frame graphics -- you can use it for that,
or you can use it for pretty much the highest level rendering
you can think to do in real time, fully texture mappped, fogged,
light sourced, alpha blended, things like that. It supports
most of what you look for.
Another reason is that all your friends are doing it, it's the most popular 3D interface right now, it's completely, I mean, it is in the process of solidifying its position as the 3D API, and it doesn't show any signs of weakening. It makes your dreams come true. It, like I said, can do pretty much everything you want it to. There are not too many limitations imposed by the API. So if you want to do something with GL, if you want to do something in 3D graphics, rather, GL will probably let you do it. The path may be long and wandering, but you can do it and the likelihood is you can do it while fully supporting all the graphics hardware out there.
And it will make you feel good, because it's really quite good at what it does. And the interface is not overly complex for the power that it gives you. So those are the reasons that you would want to use it.
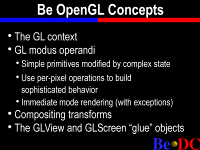 Concepts that you will need to know to
use GL and BeOS. Well, there is the GL context, which
is the basic state which is maintained. GL is very state
based, it works by having a state which is associated
with a view -- with some kind of window on the screen or
the full screen, depending on what kind of rendering you
are doing -- and your state associated with that covers
every aspect of the view, lighting, the material you're
rendering with, matrix transformation, everything like
that. And that moves into the GL modus operandi:
simple primitives modified by complex state. You can
render a single triangle or a set of triangles or
fans of triangles or strip of triangles, simple
primitives like that, but you can make them do anything
you want by rendering them within the context of a
specific global state.
For instance, I can set my state to be Gouraud-shaded and Z-buffered and things like that, and run my rendering code, which draws my primitives, and everything happens as expected. Now I can change that state and call that same rendering code and it's drawn in much less detail. It's very handy.
Use per pixel operations to build sophisticated behavior. Well, under GL you have a number of buffers. You think of a frame buffer, you say, well, that's my color information, that's my pixels, right? That's true. Under GL, however, you have many buffers. You have the color buffer, which includes front and back buffers, if you are doing double buffering. You have your depth buffer for Z buffering. You have an accumulation buffer, for doing all sorts of motion blurring and things like that and compositing of different scenes. You have the alpha buffer, which may or may not be different from your actual pixel buffer. And you have your stencil buffer, which allows you to do all sorts of neat effects that I won't really go into here because it gets pretty complicated. But that's sort of the GL way of doing things: use per pixel operations. A perfect example of that is Z-buffering. Z-buffering used to be considered, well, too expensive for doing high speed 3D graphics. And that's somewhat true, when you have small numbers of polygons it's almost certainly faster to go and sort your polygons and draw them in the order that they are from the viewer. So you end up having backface removal done for you that way. However, the order of execution on that grows at a much larger rate than per pixel operations like Z-buffering do. So when you have a large number of polygons it ends up being a lot cheaper to do per pixel operations. Another advantage is that per pixel operations of course can be implemented in hardware and often are. On a lot of cheap hardware nowadays, too.
The third thing to remember about the GL way of doing things is that almost all of it is immediate mode rendering. Everything is done in immediate mode; if I draw a triangle, it gets thrown out to the graphics hardware or it gets thrown out to the software renderer and it's rendered. There are a couple of exceptions to that, like display lists and ways you can store operations to be done later. But this is an important point because it helps you fully exploit the hardware again: you throw out a triangle, the hardware goes off and does the rendering, and you can go back and start working on a calculation for your next triangle. So those three points pretty much describe the GL way of doing things.
Compositing transforms. That's part of the GL state that's maintained. All of your transformations are part of the state. I composite transforms by multiplying the current matrix by some transformation matrix and then rendering my triangles and rendering my points, and they are transformed according to the current composited transformation, which is part of the current state. I will go into a little more technical detail about that a little later when we get to code.
The GLView and GLScreen glue objects, this is the Be specific, so to speak, way of managing the GL context. GL does not actually provide any way of creating a GL context and associating it with a window or the screen or anything like that. That's all up to the windowing system. GLX library does that under the X Window System, and our way of doing it, is of course, two nice C++ classes.
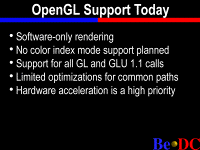 The OpenGL® support that we have today.
In the Advanced Access CD and in the final version of DR9,
we are supporting software only rendering. At the moment.
So there is no hardware acceleration at this point.
No color index mode support is planned. GL supports a lot
of interesting modes that use color indexes and let you do
all sorts of wierd hacks, but those modes are fairly
limiting. They're usually used for speed gains or
interesting little hacks, but aren't really useful in
the general case when you have -- when, you know,
processor speed is increasing so quickly and we have all
this fast 24-bit and 16-bit color hardware coming
out. We don't see the need for it. Again, if you want
it, let us know.
Support for all GL and GLU 1.1 calls. We are aware that the GL specification is evolving and we are dedicated to supporting any revisions of it. Right now we support the GL and GLU 1.1 calls. We do not right now include GLUT support, or AUX or TK, the standard GL C windowing tool kits in DR9. Again, if you want that... well, we will probably have GLUT pretty soon. AUX and TK are not very exciting (for those in the know about GL), but let me know, I will give you information about how to get in touch with me about what libraries you need.
Limited optimizations for common paths, I have done work in optimizing the things we think people are going to use most, including standard Z-buffered Gouraud-shaded stuff. Alpha buffering and things like that we haven't gotten around to optimizing yet, especially texture mapping I haven't optimized nearly as much as I want to, and I'm definitely going to get to that as soon as possible.
And the last point here is probably the most important. We are making hardware acceleration a big priority. I want to stress, as I told by the marketing guys I have to stress this, that we do not have any hardware acceleration support in the Advanced Access CD that you are receiving. I really want to get to it as soon as possible. So look for that maybe during the lifetime of DR9, or well, as soon as I can get it.
Okay. So, I'm just going -- I was told I have to go a little faster, so I'm going to sort of, okay, so it's an interesting slide, right? Let's go to the code.
(Laughter.)
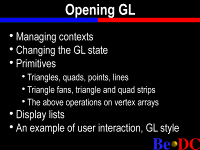 So here is just a quick
example of a GLView descendant that you would use to
encapsulate a GL context. You derive from GLView here,
and you have some member functions here. I just call
the constructor and my GL context is established by
this object. Now the important thing to see here is
this set of flags that I'm passing into the GLView
which specifies what I'm going to want to do with my GL
context, this says right here, for instance, that I
want to use RGB rendering mode, which is currently the
only one we support. I want to use double buffering
and I want to allocate a depth buffer, for Z buffering.
There are a couple other flags you can use.
This is just -- I mean, as I said, this is sort of a contrived example but this is an example of how to set up a GL context. So, LockGL() is a call that is a member function of GLView and GLScreen. It sets the context controled by that object to be the current context. There can only be one global current GL context, for obvious reasons: if you are using hardware you don't want to have multiple applications or multiple threads writing to the same hardware at the same time. They might want different states, and it's just a mess. So you lock the global GL context, this part enables Z-buffering... I set my shading model, I specify my backface culling, I specify that I want some lighting, I define a light, I define a material, I enter projection matrix mode and define my perspective, and that's pretty much it, and then I go back to the mode-view matrix. This is all specific stuff that I can't really go into it right now. And then we are done with initialization so we go unlock the GL context.
Here is simple code to draw a triangle. I haven't locked the context here because I'm assuming the GL context is already locked, but you must always lock context before drawing. glBegin(GL_TRIANGLES)... this is any one of eight GL primitives: triangle strips, triangle fans, quad strips, simple things like that.
Then you push vertices down the pipeline along with normal information. You could also have glTexture() here to specify texture coordinates for each vertex, and other information like that. You could also specify different colors, although without that we default to the current drawing material we defined earlier, so what we'd get out of this would be a nicely Gouraud-shaded and lighted triangle, using the options we defined above.
Here is a frame drawing routine which just goes through and calls that triangle drawing routine in a loop. This is intended to be called in a thread; you really shouldn't do your rendering for GL in a window thread because that window thread has display priority which is quite a bit higher than the normal thread priority and GL is pretty compute bound, so you'd end up bogging down the system, so usually you should spawn another thread to do your GL drawing. So we clear the buffer, we push a matrix onto the stack that saves the current matrix, we translate, rotate, draw a triangle and return, popping the old matrix off and swapping buffers, which is a call implemented by GLView and GLScreen which swaps the front and back frame buffers, to used when using double buffering. And we unlock the GL context.
So here is just an alternate version of that same exact thing except we are using a call list. See, up here we created a call list: new list, draw triangle, end list. And so we've stored these drawing routines in that call list. Now, obviously this example is kind of stupid because we are just drawing a single triangle. But any GL call pretty much that is not neccessarily synchronous and so doesn't require any kind of return value can be composited into a call list. The nice thing about that it lets us (Be) worry about all the optimizations that we can do on the calls stored in your list, and it allows us to have more information about exactly what you want to do and thus make it faster.
Here we're just instantiating an application object, instantiating our view and putting it in a window, et cetera, et cetera. Here is the neat thing I wanted to point out, and this is another perfect example of how you use per pixel operations under GL to do what you would usually do in a 3D library by doing transformations yourself. So, if I click on my window and I want to find out what object -- let's say I have an object list and I want to find out what object was under the cursor when I clicked, so I can move it around, or rotate it, or whatever. Well, usually, in an API which assumes a software-based renderer, you would probably check where that line is going in the perspective of the view and do some geometry and calculate what polygon it intersects with first. Now the problem with that, is that if you are using this really complex 3D hardware that cost you $8,000 and you are running on, you know, a nice host processor that cost you maybe $1,500 -- well, you have all this complex 3D hardware that does all the transformations for you and then when you click on the view, to find out which object you clicked on you have to push it all back into the host processor and do all these transformations yourself, which just doesn't make any sense. So a neat trick to do under GL in order to find the object under a cursor is to just go through and draw all the objects in a no-frills rendering mode, each one in a different color, then just look at the pixel under the cursor in that drawing and see what color it is. And that's what this code does.
And this actually ends up being very, very usable. The nice thing about it is if you have a lot of 3D hardware, it takes full advantage of that. You don't have to do any of the work on the host processor.
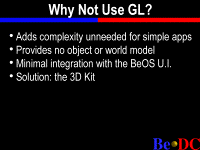 Before I do that I just -- well, no, I
already showed my funky little teapot demo in the main
session. So I will just talk about why you shouldn't
use GL. Well, it adds complexity that you probably
don't need for simple applications or even moderately
complex applications, a lot of times the API is just
too heavy weight for what you want to do. You can do
really simple applications with it, but obviously the
setup tends to be kind of overkill for a lot of simple
applications. It provides no object or world model,
as it's a very low level API, about as low level as it can
get while still maintaining support for all this
hardware. So, it doesn't provide any C++ object model
or world model. And it has minimal integration with
the BeOS UI. As I said, that's a neat little hack you
can use to get your object position and it's used very
often, but you have to do it yourself, right? All
things like that, all the integration you have to do
yourself. So, the answer to that is the 3D Kit, which
Pierre is going to talk about. I'm just going to put
on a little cute demo that I cooked up for this.
(Demo on screen.)
Here is Pierre to talk about the 3D Kit.
(Applause.)
[Webmaster's Note: Example source code used in Pierre's presentation can be found on the Be FTP site.]
PIERRE RAYNAUD-RICHARD: I am afraid I will need a short time to prepare something.
Okay, sorry.
So, as George explained just before me, 3D Kit is our lightweight 3D API.
A SPEAKER: You have a magnetic personality. The speaker.
PIERRE RAYNAUD-RICHARD: Can you hear me? So
I will try to speak somewhere else. Okay.
 So what I am going to speak about is first a little
complement to what George just said; why do we need
another 3D API and not choose only OpenGL®? I will do
a quick overview of the technical part of the video 3D Kit
and then we will go into some sample code to see how
we can use the 3D Kit API to do image 3D and put it in
BeOS and have a quick look into what will be in the
first release of the 3D Kit, which is not in the CD-ROM
that you got, but it shouldn't be very long, as soon as
possible.
 So the first part, okay. So I don't know if any of you
have been playing with 3D, but the whole problem with
3D from other people we have been working with is
that it's complicated, so all the people who tried to do a generic
3D engine, efficient and easy to use, for all sort of
problems, just discovered that it was pretty
damned difficult. And so that's why OpenGL® is doing
only some part, it's doing the low part of the 3D and then it
lets you do everything else and adapt it to your specific
needs. If you need to do something really simple, then
you still have a lot of work to do on your own. So what we are trying to
provide is something that will not do anything, but will
just do some sort of thing, but if you want to build some very
simple 3D with an interactive object, and some simple stuff, you can
produce something simple and that's better integrated.
And the first way to do it is to use a real object oriented API with all its simplicity. The usual sample of object oriented API is user interfaces program on which is fitting very well, you have view, window, buttons, you just compose them, it clearly fits very well in the object model. I think 3D also is fitting very, very well in the object model.
And so we are using all the power of the object model in the 3D Kit, That power is also used to encapsulate information about the ways the user will interact with the object, everything is in one class, very useable and re-useable.
It's -- our main goal on the 3D Kit is not to do high qualities for view rendering, for movie production like all the special effects, you can see in movies, that's just all the difference between QuickTime movie and a very nice picture. You don't see horrible small defaults if the thing is moving, when the picture just goes and goes and goes. So that's the idea of the 3D Kit, we want something which will give interactive speed, and not nice "frozen" pictures.
Now, another interesting element of the 3dKit compared to the OpenGL® API is it can be completely integrated in the user interface, so we will easily support interaction with the cursor, drag and drop, all sort of things like that, That's why George explained the 3D Kit is our simple alternative to OpenGL®. Okay. I want to do some 3D, I can use OpenGL® or a 3D Kit, which one is better, you will have a clear choice. If you do want to do something professional, something where you need a lot of control, for which you will do all the geometry control yourself, you will have to use OpenGL®. If you just want to make some 3D in your application, you can use a 3D Kit. Very simple distinction.
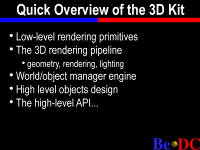 So, now, we present the architecture of the 3D Kit from
the bottom to the top in five levels. The first level is just
basic rendering. Like drawing a triangle,
Gouraud-shade triangle or texture map triangle.
About that part, the 3dKit and OpenGL® basically do the
same thing. OpenGL® implement all cases, not very optimized,
the 3dKit implement them better, but only some of them.
We are going to change that and merge both libraries together,
and so we will have a nice shared library for rendering,
with a clear interface, and that API should be public, so that
if you just need a fast renderer API you will be able to use it.
The second level. The 3D pipeline geometry, rendering, lighting and the glue to go from your rendering to drawing primitives is naturally backed by the 3D Kit that I use. I try to use completely the object oriented, so you will find a lens object, which is doing geometry, you will find a light object, which holds the lighting, you will find the look object, which is doing all the glue to get the stuff done, and you just need to create one of each, put them together, usually it's done for you automaticall by default. If you want to improve the lighting, adding special support, you just write another lighter and overwrite the previous one, just working like that.
So those two first levels are basically equivalent to what OpenGL® is doing. We can imagine in the future replacing the current one or adding another API to support OpenGL® as the rendering engine of the 3D Kit.
The third level, which is much more typical of the 3D Kit, the world object manager engine, that will help you establish relationships between objects, sorting objects, and moving objects into background scene and something like that.
The fourth level is just using a class, that's what I was talking about just before, to encapsulate more than just the description of an object and its appearance in a class but also its behavior when you drag and drop an object from it or to it, when you click on it. You can encapsulate everything in that and get one just one nice class that is perfectly re-useable.
So the fifth level is the API for people who don't want to mess with this because it is a bit technical. If you have questions about the first four levels, I will ask you to come see me after this. I will not give more details now. If you don't want to use that, you can just use the basic API. That's what we will do now. So let me switch here. Quit this nice GL code and try to find mine, which will be somewhere here.
 Here we are. So this is a simple project, here we have a
basic application, I just created the application object,
my window and then instantiate of wView, which is a
subview from 3D view, basically that's just a little view.
Now I see what is in the view, so wView is a subclass of
B3dView, which represents the way you integrate 3D in a
view, just like the 3D view for OpenGL®. So now I have
a few simple -- let's try to get just something on the
screen, so just create a 3D view. The view creates a global
context, the universe which will manage for you all the
problems of gluing things together. To just establish a
link between objects, most of the time you create an object
and say it is in this universe, and the universe will do everything else
for you. As we are in a multithreaded environment, we have to lock
the universe. And then let's create an ellipsoid. So
you set the gabarit, the shape of the box containing the ellipsoid,
and you create the ellipsoid, you say it's in the default universe
of this view, you say approximately 500 faces, and you ask to have a
model with visible faces. And you move the object by 10 units
on the X axis for imaging, and
then you set the color to standard value and you take
a random direction for the parallel light, which
is light like the sun, and you put an ambient light which is a
little light coming from everywhere, and you take the
camera, take the viewpoint of the camera, and you say
look at my object. And that's it. Then you can unlock the universe.
So let's compile it, it's done. Switch here. I go a little further and here we are. We have an ellipsoid. You can see the face, I have a light, I can move the object. That's first thing, just getting something on the screen. So let's see something a little more interesting.
So now we will have the same thing, creating an ellipsoid, but we will add something which is called a link to its axis, the idea of a link is to describe any relationship between different objects and the flow of time. Here is what I described, I create an axis link, which is just a rotation around the specific axis, which is Z in that case. I defined the speed and then the object will turn around the axis automatically by a factor of axis link. I create a cube and then I link it as an orbit link and it will turn around the sphere from the position it starts, at that speed, and I put another sphere, this time I use a smooth model flag, and I link it in orbit around the cube, and then I put two lights, and then this a parallel light -- no, I put four lights, sorry. One red, one green and one blue. And on those lights I add a link, which is a JigLink, that will just turn the light randomly around the scene and that's all. And I move my camera to look at the ellipsoid. Oops, sorry. I have to change this one. So compile it. Here.
Right again, so here we are. We have the strange light with the ellipsoid in the middle, the cube around the ellipsoid, also the light randomly around the sphere. Pretty simple. So that's a little better. So let's go to demo 3.
Demo 3 demonstrates a use of level of detail. So if I can find my way here. So what I do, is here I put a cube, that is the reference object, I will use a special link I define in that file. Just for my purpose. Which -- so you can see the API, the wLink, it gives all the masters of your slave object, so I have two masters that will give me a reference direction, I have another master that I will use to get a reference angle, and I give an axis to say I want to turn around a given axis, and what this is doing is putting the slave on a circle which passes by the two first masters and a curve, which is defined by the position of the third master. So I just keep track of all the masters I declare. When the slave is registered I look at the distance between the slave and the first master and then this function is called each time the universe wants to move in time, and so it's calling its name saying this is your slave, and this is the time of the previous frame and this is the time of the new frame. So you are responsible to do whatever you want to do on the slave.
And what it's doing is looking at the position of the masters, it's calculating the curve you want to apply in the circle and then move the slave. And that's all.
So I put my cube as a reference and then I create a sphere with 500 faces, ellipsoid. Then I share the model of that sphere by cloning the first one, so that I use only one model but I have mutiple instances I can put in different places. And then I do a loop and create 250 of those spheres, I link on the previous one with that link. They will all describe the same circle. And the curve of that circle will be defined by the position of the cube, they will not be moved by algorithm to be put on the circle, they will be moved dynamically by the links. So here we have 250 spheres and 500 faces, so it's 125,000 triangles. So let's see the result.
So here we are, here is the cube, when I move the cube the spheres are turning in a circle, when I move it out, it closes the circle.
(Applause.)
If I come back, you will see if I come slowly that this machine is fast but it's not fast enough to be really interactive when I am seeing all the 125,000 triangles. That's a shame. The machine is really slow. So let's close that and try to do better. So I go back to my code, and then I, what I am doing here is I put in the simplest sphere of only 100 faces and say create a level of detail object and use it a simple definition, if the visible side of the object is smaller than 60 pixel, and then I do it again, I take that LOD object and I create a sphere with only 20 faces, that will be visible if smaller than 15 pixels. Let's try that and see if it's better.
Let me know if you see any difference on the screen. So it looks the same, if I turn on the right here, you see the spheres in the foreground, it seems okay, it is the same. But now when I am in the middle it's a little more interactive.
(Applause.)
That's it for No. 3, so I'll go back here, and put in demo No. 4. Okay.
So demo No. 4 shows something different, which is the idea of varying the interaction with the user of a specific object, so I create a specific object, a specific cube, which is a W cube, which basically generates a 3D cube, a simple cube, just memorize the size of the cube and when somebody will click on the cube, this will be called the first time, and here what I will do is -- what I want to do is when you take an object, the default interaction is to turn the object. I want something more sophisticated, depending where I click on this cube, if I am clicking near a corner, near the edge or somewhere else. If I click near the corner it will turn as usual. If I click near an edge it will move on Z, if I click somewhere else it will just move in the plane of the screen. Here at the first click I just get here the coordinate on which my object has been touched in its own referential, in its own model, so I calculate if I need to turn, move one way or another. Then each time I will move the cursor, using the inherited call if I want it to turn, or just taking the move of the cursor and scaling it, depending on the setting of the lens, projector, and depending on the depth of the object, to have something which is proportional to the real move of the cursor. Then I just move the object. And I do the same for the depth. That's all I have to have. And then now I have a new type of cube, I create one, I have two lights, I have the camera, compile that. And here we are. So it's not really a cube, but a box, so if I click near the corner it turns, just as usual, if I click on the edge, I get this, and here I can drag it. So it's that easy to implement user interaction on a 3D object. This is completely encapsulated in the class.
So another interesting thing that you are probably wondering about, can I create more complex models? I think the answer is yes. So I will go see demo No. 5. Demo No. 5. What am I doing?
So the problem and the advantage of the model I'm using for storing objects is that it's optimized, so it's efficient and it's small but it's not very easy to edit, so when you want to edit an object in detail you put that object in a face editor, and it's very easy with this object to change how the model will look, and then you ask this object to create a compact version which is used by the engine.
So here I put a face editor and I give him back the description of the model in points and faces, then I set a color, all the faces the same color, oh, it's a teapot, who knows, and I put the object responding to a description and then I don't need the face editor anymore. So the object I move it someplace, I put a rotation on it, and turn the camera. So let's see. Here we are. And here I have my teapot. It's a 3136 triangles teapot, this light is a basic light, I don't do spectacular lighting, but it's actually the same thing that you saw with OpenGL®. And it's reasonably fast. George thinks it's actually faster than OpenGL®.
So now, let's go back one last time to the view source and let me show you the last part. In the last part I am trying to do something a little more sexy, because that demo was pretty boring. So let's try and see what we can do.
This is No. 6. I will just show you the length of the code. Here is a universe, so let's go down, okay, there is more code, not much more. That's all, all I need so I will compile. I go back. Oh, is it finished? Yes. Go back to No. 3 -- no, bad click. Okay. Let's run it. So what I have looks a little better.
(Applause.)
So for me it looks like two teapots with an environment reflection and it looks like a reflection front the one in the front on the one in the back.
(Applause.)
So let's try, if I can see it bigger, here it is. Nice teapot.
(Applause.)
How am I doing that? Not with a slide, but let's go back to the source. So I lock the universe, I load a TIFF image, that loads an TIFF image that create a bitmap, then I give that bitmap -- which creates a 3D graphic channel, which is basically something that can carry any stream of graphic data. This one is static, it will always display just the same picture. So this is the picture I use to map the teapot. Then I create the teapot the same way than before, but this time I set not just the color, I set mirror mapping on all faces using that picture. That will be my first teapot. Then I put a rotation on the teapot just for fun, and here I create a very interesting object, which is the equivalent of a view but for an offscreen. So we are creating an offscreen, viewed by another camera which is placed in the same universe, but the background of that image will be the same image. Basically I am taking the same picture, putting it in an active channel that will be able to add something on it using a camera put in the same universe and use it exactly just as I am using the picture. After that I clone my teapot, put it in a face editor to change the appearance, and set mirror mapping using the active graphic channel, then I get my teapot, making it turn, and then I move the camera view to look a little between the two teapots, and here I put the viewpoint of the camera of the off screen channel to be at the same place on the second teapot and I turn it to look pretty close from the first teapot. And I change the opening of this camera to have a very wide angle. And that's all. So what's happening, the second camera is looking at the first teapot and adding the picture of the first teapot on the same picture that it's used to map on the other. So you just have the feeling that you see the reflection in realtime, which is what you get here. Here we are.
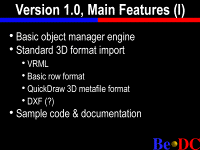 So, now let's talk a little bit about what you are
supposed to get in a few months, the most interesting part
of the 3D Kit, which is object manager engine, will be
pretty simple in the first version, you will essentially be
able to play with objects but not with background. If
you read my white paper on the web site, you will see
we are thinking about being able to play with
landscape, play with rooms, we want to do things like a
game like a flight simulator, but that part will not be
implemented in the first version. You will be able to
import basically a set of 3d models like VRML, 3DMF and
some basic formats, like the one I'm using for the teapot,
with an interface.
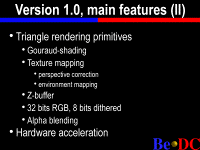 So I have a question, who thinks the DXF format is of
any interest? Can you raise your hand, please?
< Half a dozen people raise their hand. >
Thank you very much. You are thinking the same thing I am.
One big difference is that there will be documentation, amazing, and we will try to put a lot of sample code like these ones. And on the rendering side we want to share with OpenGL®, we have the list here, and the hardware acceleration at that point will be probably shared also with OpenGL®. I will not lie by saying this will not be released soon, but we will try to have a beta version for developers only ready as soon as possible, because as usual we want to have feedback from people who really try to use it.
So that's all, thank you for listening.
(Applause.)
PIERRE RAYNAUD-RICHARD: Do we have any time for any questions? Pretty short. A few questions? Yes?
A SPEAKER: Hardware acceleration.
PIERRE RAYNAUD-RICHARD: Excuse me?
A SPEAKER: Hardware acceleration.
PIERRE RAYNAUD-RICHARD: Oh, acceleration. As I said, we will be sharing that with OpenGL®, there is more and more manufacturer providing OpenGL® library, so that they can use whatever their card implement, and do everything else in software. So we think we will use that scheme and in that case, as I showed you previously, probably we will just remove the two first levels and put OpenGL®, an accelerated hardware version of OpenGL®. That will be a nice and common way to support hardware acceleration in both libraries.
A SPEAKER: How far is the integration of the 3D Kit from OpenGL®?
PIERRE RAYNAUD-RICHARD: The question is how far is the integration of he 3D Kit from OpenGL®? Not very far. But no, not very far. But that will be the way most work about that will be done in the future. Okay. So I think we -- the last one?
A SPEAKER: Are you going to support multiple accelerators?
PIERRE RAYNAUD-RICHARD: Multiple accelerators?
A SPEAKER: Multiple cards.
PIERRE RAYNAUD-RICHARD: To render different scene or to render the same one?
A SPEAKER: Same scene.
PIERRE RAYNAUD-RICHARD: Same scene. I think it's pretty damn difficult, because from all the experience I had when you are working on one scene you have typically one big pipeline with a tremendous flow of data going through the pipeline and breaking it implies a lot of synchronization overhead. So in a first time, I don't think so. But you can easily handle multiple scene in parallel.
Okay, thank you.
(Applause.)
Home | About Be | Be Products | BeWare | Purchase | Events | Developers | Be User Groups | Support