 Dial-up Networking

 Dial-up Networking

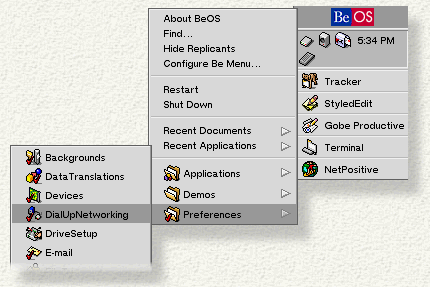
If you're connecting to the Internet through a modem, you need to use the DialUpNetworking preferences application to configure your connection. To launch DialUpNetworking, click on the Be logo, open the Preferences item, and click on DialUpNetworking :
When you launch DialUpNetworking, you see this window:
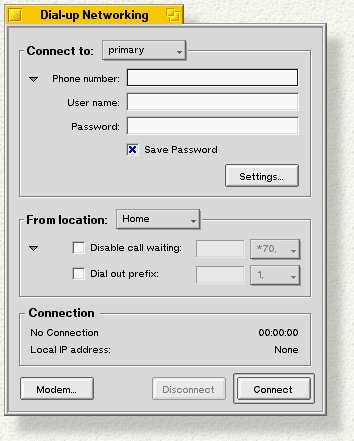
DialUpNetworking lets you configure any number of PPP accounts (or "connection settings"). These settings can target different ISPs or different accounts within the same ISP.
To create a new connection setting, open the Connect to menu and choose New. This brings up a panel (not shown here) that lets you name your connection.
Back in the Dial-Up Networking window, type the phone number, user name, and password that you use to connect to the network, as supplied by your ISP. Check Save Password if you don't want to enter your password each time you connect.
If your ISP has given you a static IP address or specific DNS addresses -- or if you're having trouble forming a connection -- click the Settings... button. If you don't have a static IP address (and so on), skip down to Configuring a Location.
The Connection settings panel that appears lets you specify your IP and DNS addresses, and lets you choose a server type.
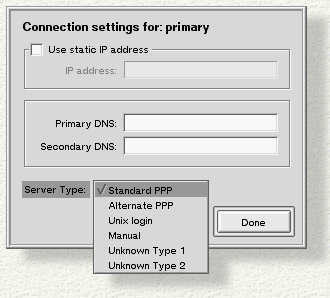
Check Use static IP address and type in your IP address. If you don't check this, the IP address will be configured dynamically.
Enter a Primary DNS and Secondary DNS address. These addresses are not configured dynamically.
Choose a Server Type. Most servers will recognize the Standard PPP setting. If that doesn't work, try working your way down the list until you find something that does work.
Click Done when you're finished.
The modem icon in the Status View displays a list of all the connection settings that you've created. (An illustration is given in "Starting a Connection," below.)
The middle section of the DialUpNetworking panel lets you create a "location" setting.
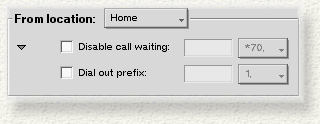
The setting lets you declare the code that's used to disable call waiting, and a prefix that's prepended to the Phone number.
The From location menu lets you create a New setting, or choose one of the two defaults:

|
A comma in a dial out prefix means "wait a few seconds before proceeding." |
At the bottom of the Dial-up Networking window, click Modem to bring up the modem configuration panel.
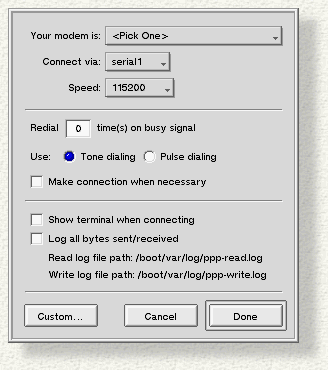
The top portion of the panel lets you select your modem type and speed, and lets you specify the hardware port that you've connected your modem to.
The middle part of the panel lets you set dialing preferences. The Make connection... checkbox tells the system to automatically initiate a PPP connection when an application (such as NetPositive) needs it. If you don't check this box, you'll have to start the PPP connection yourself before you can run applications that want to talk to the network.
In the lower part of the panel, check Show terminal... to tell the system that you want to see a connection information displayed in a terminal whenever you make a connection through PPP.
Check Log all bytes sent/received to record everything that's sent and received over PPP. This is handy if you need to debug your modem connection. The log is written to the "Write log file path" that's named in the panel.
The Custom... button lets you modify the modem initialization string. The custom panel includes an AT Commands... button that will help you construct the string.

|
You should only modify the modem initialization string if you know what you're doing. |
To start a PPP connection, click on the modem icon in Deskbar's Status View.

The PPP context menu pops open; at the bottom of the menu you'll see a list of the connection settings that you've created and named. Select the setting you want to use, and then click Connect. The modem icon is animated to show network traffic.

|
The modem icon is placed in the Status View when you create your first connection setting. It's removed when you delete all your settings. |