 NetPositive

 NetPositive

NetPositive is the BeOS-native Web browser. To launch NetPositive, click on the Be logo, open the Applications item, and click on NetPositive. This is the NetPositive browser window:
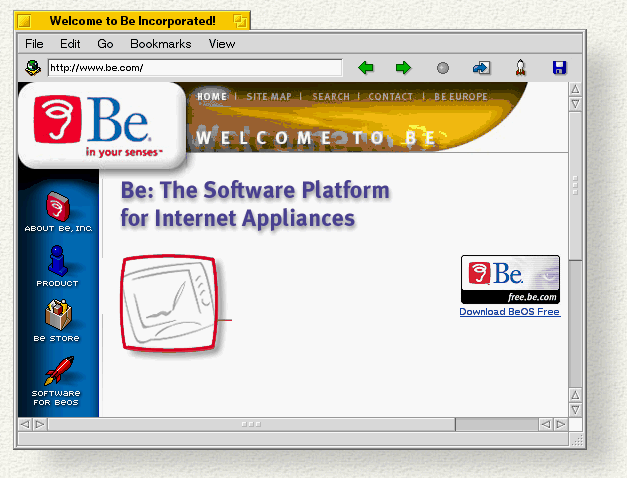
The text field near the top of the window shows the URL of the current page; type a new URL into this field and press Enter to go to that site. Moving to the right, we see a series of buttons:
The search engine and home page icons aren't displayed until their locations are set.
The area at the very bottom of the window displays a keyhole icon when you're entering a secure site, and describes the status of the current page download ("Opening...", "Loading Text...", etc), or the address of the link the cursor is pointing to.

To open NetPositive's preferences, choose the Edit > Preferences command. Click a tab at the top of the window to bring up a set of preference controls, as described in the following sections.

|
Although most NetPositive preference changes take affect immediately, your best bet, after making a change, is to restart the app anyway. |
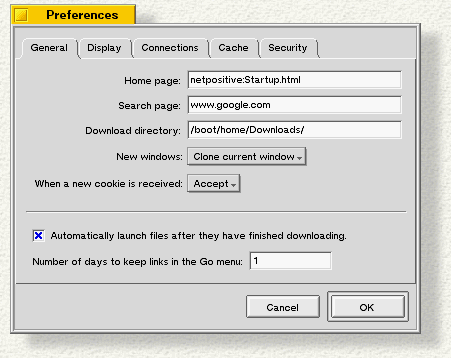
Home Page. Set this to the URL or domain name that's opened by default when you launch NetPositive.
Search page. Specify your favorite search engine. To go to the search engine, click the flashlight button in the browser window.
Download directory. Set this to the folder where you want your Web downloads to go. The default is /boot/home/Downloads.
New windows. This menu lets specify what happens when you open a new window. The new window can open the same page that's open in the current window (Clone current window), it can open to the home page (Open home page), or open a blank page (Open blank page).
When a new cookie is received. A cookie is personalized data, such as a shopping cart, or login information, that a server stores on your computer. You can Accept all cookies, Reject them, or Ask to be notified when a cookie is being downloaded.
Automatically launch.... When a file finishes downloading, it's automatically opened if this checkbox is checked.
Number of days.... The Go menu saves recent links so you can return to them easily. How long it saves them depends on this setting.
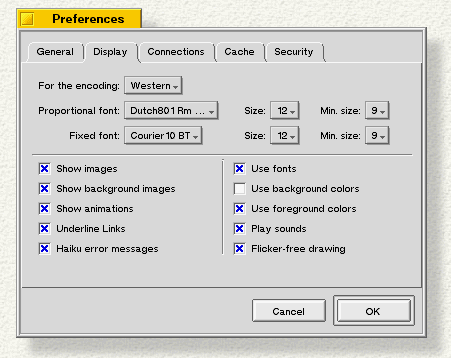
For the encoding associates the font settings (displayed immediately beneath) with the given character encoding. In addition to Western, you can also make font settings for Unicode, Japanese, Greek, Cyrillic and Central European.
You apply an encoding to a page through the browser window's View menu.
The checkboxes in the bottom half of the panel are mostly self-documenting.
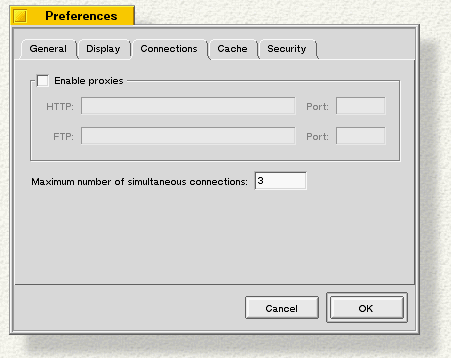
Check Enable Proxies if you have a proxy server for special caching, or possibly for security reasons if you have a firewall--if you want to run your Web connections through a different server than the one you're actually connecting on.
To set this preference fill in either a host name or IP address for HTTP and/or FTP. The ftp proxy should point to an http proxy, since NetPositive only understands how to proxy through http.
Max...connections lets you set the maximum number of simultaneous Internet connections to make from one window. If you're using a modem or running on slow hardware, you may want to set this to a low number to improve perceived performance.
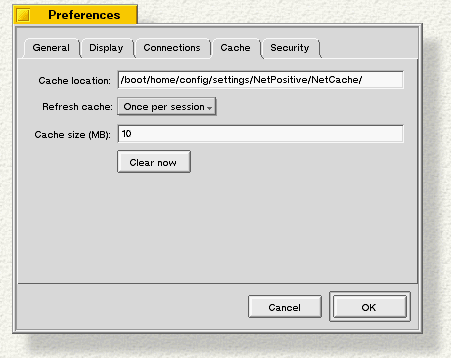
Cache Location lets you set the location of the "cache"; this is where NetPositive stores pages and images (but not files) that it downloads. Whenever you click on a new Web page, NetPositive looks to see if that page (or any of its images) are already in the cache. If they are, the cached pages are displayed instead of downloading new ones. The cache's default location is shown here.
Refresh cache tells NetPositive how often it should check to see if the pages in the cache have grown "stale." If a page in the cache is out-of-sync with its "real" version (on the server that served the page) the cached version is thrown away.
Leave Cache Size at the 10 MB default, unless you're really squeezed for disk space. Set a larger cache if you're a heavy browser.
Clear Now button deletes all the files currently in the cache.
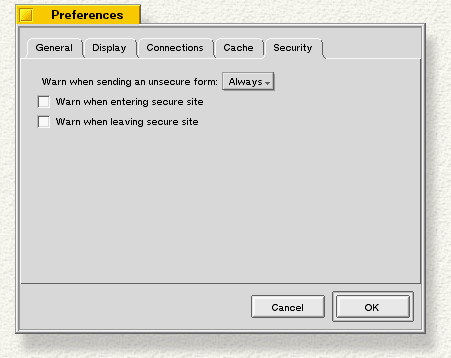
The ...unsecure form menu lets you specify whether you always want to be warned when you're sending unencrypted data to a server (Always), never be warned (Never), or only be warned when sending more than one line of data (as shown here).
Warn when entering... and Warn when leaving... tell NetPositive to display a warning panel as you click into or out of a secure site.
NetPositive contains features that are hidden or that deserve some explanation, as described in the following sections.
To create a new "bookmark" (a pointer to a frequently-visited site), select the Bookmarks > Add to Bookmarks command. The bookmark list is displayed at the bottom of the menu.
To modify your bookmarks, choose Bookmarks > Show Bookmarks. A Tracker window filled with bookmark files is opened (the bookmark icon is shown above). Throw unwanted bookmarks in the Trash; rename a bookmark by renaming its file. You can even organize your bookmark files into folders.
The View > Document Encoding menu command refers to the language encoding of a Web page. If you want to read a Japanese Web page, set Document Encoding to Japanese; a Japanese Web site viewed with a Document Encoding set to Western would be illegible. Similarly, to read a page that uses Greek characters, you set the encoding to Greek.
You set the font that's used for a particular encoding in the preferences panel, as described above in "Display Preferences."

|
To view Japanese Web pages, or pages created for any multibyte character language, you need to install a font that contains the characters of that language. |
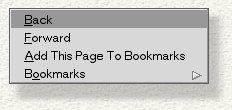
The NetPositive browser window displays different context menus, depending on what you're pointing to. Right-click in an "unoccupied" area of the browser window, and you see the context menu shown here.
When you right-click on a hypertext link, the context menu displays the commands shown below.
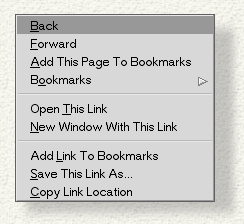
In addition to the commands from the previous window, you see commands that let you Open This Link (in the same window) or open it in a New Window....
adds the link to your bookmarks.
Save This Link As... lets you download the linked-to page as a file and save it on your disk.
Copy Link Location places the URL of the link onto the system clipboard. You can then paste the URL into a document, or into another Web browser window, etc.
The context menu for an image (not shown) includes the self-documenting New Window With This Image and Save This Image As... commands.