 Tracker

 Tracker

Tracker is the BeOS file system navigation and file management interface. Tracker windows present the contents of individual folders. The next section, "Playing with Files and Folders," shows you how to use Tracker windows to navigate the file system and open files and folders. After that, "Modifying Tracker Windows" explores how Tracker windows are set up and how you can modify their appearance.
When you double-click a folder or disk icon, a Tracker window opens on the screen and the contents of the folder or disk are displayed in the window.
To open a file, double-click it; double-clicking a folder will open another Tracker window. If you hold down the Option (or Windows) key when opening a folder, the old Tracker window is replaced by the new one.
Most of the operations you can perform on a file or folder are represented in the File menu.
Select an item in the Tracker window and then open the File menu and you'll see...
Find.... This opens a Find panel that lets you search for files anywhere on the system, as explained in "Finding Files and Folders" later in this chapter.
New Folder creates a new folder in this window.
Open and Open With... open the selected item. Open opens it in the item's "preferred application"--the application that can best display the data in the item. Open With... pops open a panel that lets you select some other application, as explained in "The `Open With' Window."
Get Info provides information about the item in a separate panel. See "Get Info," later in this chapter for more information on the Get Info panel.
Edit Name selects the text of the item's name so you can change it. (The text is also selected for editing when you click on a name in the Tracker window.) A name can be up to 255 characters long--anything but a forward slash ("/"). If you change your mind about renaming a file or folder while editing its name, press the Escape key to restore the original name.

|
Do not rename the beos folder located on your BeOS partition or BeOS will no longer work. |
Duplicate makes a copy of the file in the same folder. The new file has the same name as the original, with "copy" (or "copy 2", "copy 3", etc.) added to the end.
Move to Trash moves the item to the Trash can. The item isn't actually deleted until you empty the Trash.
Move to, Copy to, and Create Link pop open cascading menus that can show the entire file hierarchy. By descending the hierarchy and choosing a folder, you can move the item, copy it, or create a link to it in the chosen folder. (See "More on Links," below, if you have questions about links.) At the top of the popped open menu you'll see a Desktop icon, as well as the partition that the item lives on. If you choose Desktop, the item will show up on the desktop.

|
If you try to move a file or folder to a folder that's on another partition, the item will be copied (i.e. the original isn't removed). |
Identify tells Tracker to try to figure out what sort of file this is. Normally, you'll never have to use Identify --Tracker identifies new files as they're created or added to your system. However, it's possible to "unpack" a bundle of files in a manner that escapes Tracker's identification mechanism. If you think a file is unidentified (or misidentified), run Identify on it.
Add-Ons pops open a list of "modules" that can process the items you have selected. BeOS provides a couple of handy add-ons, as described in "Add-ons."

|
You can pop open a File menu for a particular item in a Tracker window by opening the item's context menu. |
You can move items from one folder to another by dragging them into the window or onto the icon of the destination folder. If you want to copy an item rather than move it, hold down the Option (or Windows) key while you drag the item.
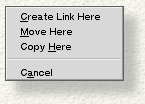
If you hold down the Control key when you're dragging a file or folder icon, you'll see the file options menu when you drop the icon. Choose from one of the options to create a link, move, or copy the file (or cancel).
![]() A link is a "dummy" file that points to an actual file or folder. The link file displays the same icon that represents the real item. To show that it's a link, the link's filename is underlined. A link is a handy way to create a shortcut to a file, folder, or application that you frequently use. You can put a link anywhere, but they often live on the desktop.
A link is a "dummy" file that points to an actual file or folder. The link file displays the same icon that represents the real item. To show that it's a link, the link's filename is underlined. A link is a handy way to create a shortcut to a file, folder, or application that you frequently use. You can put a link anywhere, but they often live on the desktop.
Once you have a Tracker window open in front of you, you can use it to navigate or "move around" in the file system. Specifically, you can open the window's "parent" folder (ascending), or open a "child" folder (descending).
As mentioned earlier, if you hold down the Option (or Windows) key when opening a folder, the original Tracker window is replaced by the new one.
Ascending. There are three ways to open the parent folder of the Tracker window that you're currently working in:
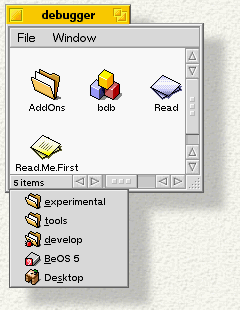
Descending. In addition to simply double-clicking a displayed folder, you can descend the file system--and descend it by more than one folder at a time--by using a folder's context menu. Press and hold the mouse on a folder and its context menu will pop open, as shown below.
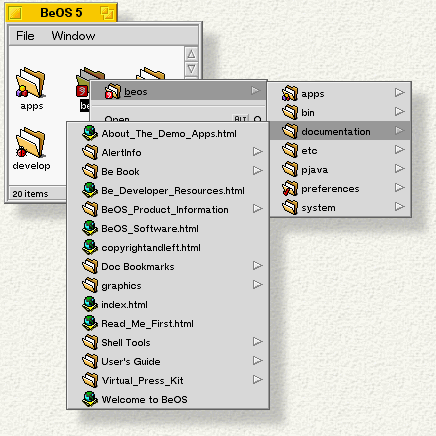
At the top of the menu is an icon for the folder itself. Move the mouse over the icon and another menu appears that shows the folder's contents. You can select a file or folder in this menu, or descend some more by moving your mouse over yet another folder, and so on.
You can also pop open a folder's context menu by dragging and holding some other file (or folder) icon over it. While navigating the target folder's contents, you can drop the dragged icon onto a folder in the menu to move the dragged file/folder into the dropped-upon folder, or drop a dragged file onto an application icon to open the file with that app.
As you can see in the illustration above, the menus double back on themselves--and will even sprout scrollers, if necessary--to keep from spilling off the screen. For a complete list of keyboard shortcuts that you can use to navigate Tracker windows, see Shortcuts.
A Tracker window can display its contents--the files and folders it contains--as icons, mini-icons, or as a list view. You change display modes by choosing an option from the Window menu
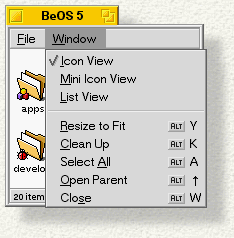
Icon and Mini Icon View. In Icon View and Mini Icon View, you can move an icon within the window by dragging it to the location you want. If more than one icon is selected, they all move when you drag.
Some of the commands in the Window menu arrange the icons in a grid. Choose Clean Up to align each icon in the window to the nearest location in the grid. If you hold down the Shift key, Clean Up changes to Clean Up All, which sorts the icons in the window in alphabetical order.
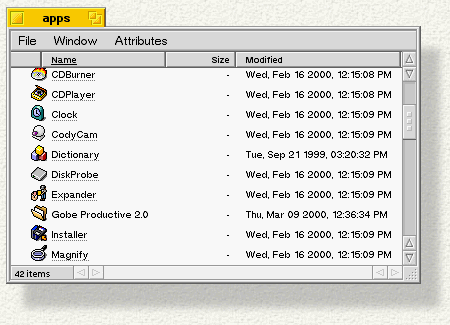
List View. In List View mode, shown below, the Tracker window displays its contents in a vertical list, and additional facts, or attributes, are given for each item in adjoining columns.
Pop open the Attributes menu to select the attributes you want to display.
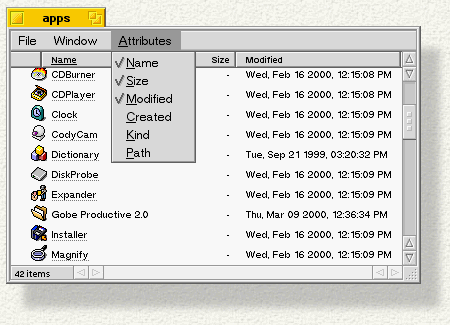
The list of attributes depends on the type of files the window contains, but some common attributes (name, size, and modification date) are available to all files
To change the order of the attributes, just drag the attribute title to a new location (within the attribute title bar) and drop it. To remove an attribute, grab the title and drag it out of the attribute bar. You can resize an attribute's column by dragging the divider between two titles. A special cursor shows that you're in resize mode.
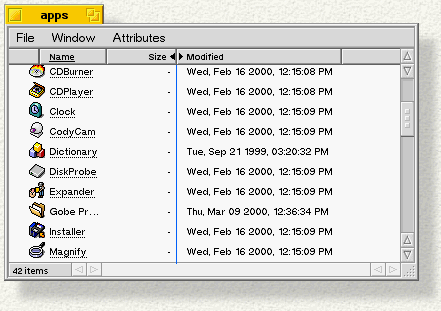
Initially, items in List View are sorted alphabetically by name--in attribute-speak, the name attribute is the primary sort field. To set the primary sort field to some other attribute, simply click the attribute's title. Notice that the attribute you clicked is now underlined.
To set a secondary sort field--this is a "tie-breaker" for the case where two items have the same primary value--hold down the Shift key and click on another attribute. A dotted underline indicates the secondary field. Click a second time on either attribute to sort in reverse order.
You can bring up a Get Info panel for a file (or folder) by right-clicking on the item in a Tracker window (or on the desktop) and choosing Get Info from the context menu that pops up, or by selecting the item and pressing Alt+i. The Get Info panel, provides information about the itme, and also lets you do the following:
The icon that's displayed for a particular file, folder, or volume in a Tracker window (and on the desktop) depends on the item's type or location. The generic file, folder, and volume icons look like this:
|
|
|
|
Many items display customized icons that indicate their contents or function. For example, the boot volume looks like this:
|
|
A number of BeOS folder icons are customized to reflect the folder's location in the file system. For example, the following icons are used for folders in the /boot directory:
|
|
|
|
|
|
These icons are used for folders inside /boot/home :
|
|
|
|
|
|
File icons depend on the file's type (i.e. the sort of data it contains), and are much more varied than folder and volume icons. Some of the more common icons are shown below:
|
|
|
|
|
|
|
|
|
|
You can modify the icon that's used for a particular file type and create new icons for new types through the FileTypes preference application.